


The freedom to explore open roads, wake up next to breathtaking scenery, and change your itinerary on a whim is what makes motorhome and campervan travel so rewarding.
However, embarking on your first road trip requires learning a few essential practical skills to maintain comfort and independence on the road. Among these onboard systems, none causes more hesitation for beginners than the chemical toilet.

While handling waste and toilet chemicals might initially seem intimidating, modern chemical toilets are hygienic, efficient, and simple to operate once you understand the basic principles.
Mastering setup, daily operation, emptying, and routine maintenance will ensure your vehicle stays clean and odor-free throughout your trip. This practical guide on Como usar WC quimico breaks down everything you need to know to use your motorhome chemical toilet safely and effectively.
Understanding How a Chemical Toilet Works
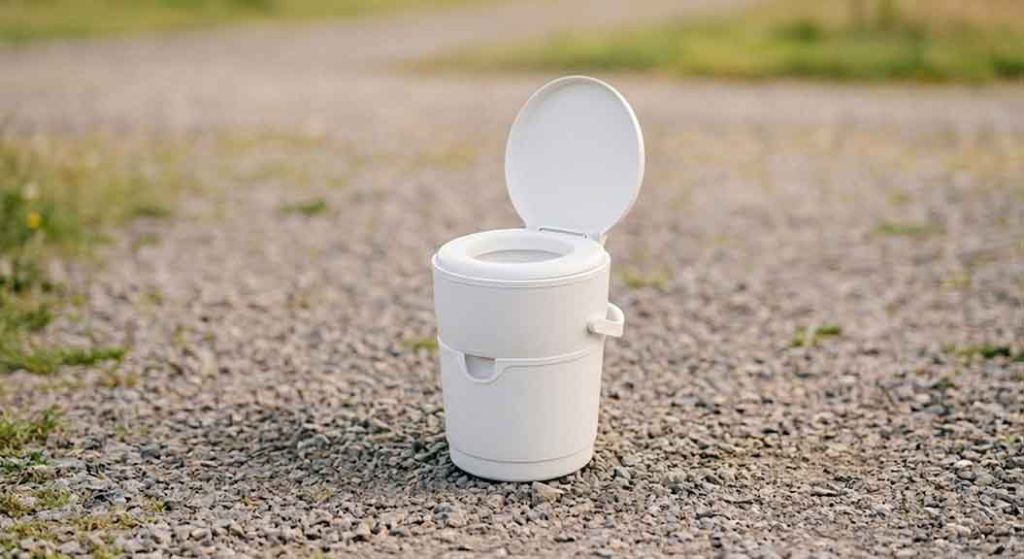
Before operating your onboard toilet, it helps to understand its components and basic mechanics. Unlike residential toilets connected to municipal plumbing, a motorhome chemical toilet operates as a self-contained sanitation system designed to store and decompose waste temporarily.
Key Components
A standard cassette toilet consists of two main sections:
- The Upper Section: Comprises the toilet bowl, seat, flush handle or electronic flush button, and, in some models, a dedicated flush-water tank.
- The Lower Section (The Cassette): Located directly underneath the bowl inside an external locker compartment, the cassette is a removable waste tank equipped with a carrying handle, a swivel pour spout, an air release vent button, and a sliding valve known as the blade.
The Role of Toilet Chemicals
Because waste remains stored inside the cassette for several days, chemical additives are essential to maintain hygiene and comfort. These additives perform three primary functions:
- Waste Breakdown: They liquefy solid waste and dissolve toilet paper to prevent blockages during emptying.
- Odor Control: They neutralize unpleasant smells caused by organic decomposition.
- Gas Reduction: They inhibit excessive gas formation inside the sealed tank.
Toilet chemicals are available as liquids or pre-measured water-soluble sachets. Liquid additives generally fall into two categories: blue chemicals (traditional, powerful formulas designed for waste tanks) and green chemicals (biodegradable, eco-friendly formulas suitable for septic systems and green disposal sites).
Additionally, pink flush chemicals can be added to the flush water reservoir to lubricate the valve seal and leave a fresh fragrance after each flush.
Preparing the Toilet Before Your Trip
Proper preparation prevents odors and ensures smooth operation from the moment you set off. Setting up the toilet takes only a few minutes before starting your journey.
Step-by-Step Setup Procedure
- Inspect the Cassette: Open the external toilet locker door on the side of your motorhome. Ensure the cassette is fully inserted, the locking clip is secured, and the rubber blade seal is clean and free of debris.
- Fill the Flush Water Tank: If your toilet uses an independent flush reservoir rather than drawing from the main freshwater tank, fill it with clean water. You can add a measured dose of pink flush fluid at this stage to keep the bowl clean.
- Add Waste Tank Chemicals: Slide out the cassette and unscrew the cap on the swivel pour spout. Pour in the recommended dosage of blue or green chemical fluid according to product instructions (or drop one soluble sachet directly into the tank).
- Add Water to Activate: Pour approximately 1 to 2 liters of fresh water through the spout along with the chemical. This initial water is essential because chemical agents require a liquid base to react properly and break down waste.
- Reinstall the Cassette: Screw the cap firmly back onto the pour spout, slide the cassette into its compartment until it clicks into place, and lock the external door.
Day-to-Day Operation: How to Use the Toilet Correctly
Using a motorhome chemical toilet is straightforward, but adhering to a few simple habits will keep the system functioning cleanly and prevent clogs.
Managing the Blade Valve
The blade valve acts as the seal between the toilet bowl and the waste cassette below. It is operated via a lever located near the base of the toilet bowl.
- Opening Before Use: Opening the blade valve slightly before using the toilet allows waste to fall directly into the cassette, minimizing bowl staining.
- Closing After Use: Always close the blade valve completely after flushing. Leaving the valve open allows odors from the waste tank to enter the living area of your vehicle, especially while driving when vehicle movement creates airflow within the cabin.
Flushing and Paper Selection
When flushing, depress the flush button or handle for a few seconds to thoroughly rinse the bowl. To ensure smooth operation and prevent clogging, pay close attention to paper selection:
- Use Rapid-Dissolve Toilet Paper: Standard household toilet paper does not break down quickly enough in a chemical cassette, causing thick clogs when emptying. Always opt for rapid-dissolve toilet paper designed specifically for campervans and motorhomes.
- Keep Trash Separate: Whenever possible, dispose of wet wipes, sanitary items, and excessive paper in a small covered trash bin beside the toilet. Non-biodegradable items should never enter the waste tank.
How Often to Empty the Waste Cassette
The frequency with which you must empty your cassette depends on tank capacity, the number of travelers, and daily usage habits.
Typical Capacity and Timeline
Most motorhome waste cassettes have a capacity of 15 to 20 liters. Based on standard usage, here is a general guideline:
- Solo Traveler: Every 3 to 5 days.
- Couple: Every 2 to 3 days.
- Family or Group (3 to 4 people): Daily or every 2 days.
Environmental Considerations
Warm weather accelerates organic decomposition and gas expansion inside the tank. During summer trips, it is best practice to empty the cassette every 2 days, regardless of fill level, to prevent pressure buildup and control odors. Most modern units feature a fill-level indicator light near the control panel that turns red when the cassette reaches capacity.
Step-by-Step Guide to Emptying the Cassette
Emptying the waste cassette is simple once you follow a structured, hygienic routine.
Step 1: Locate a Designated Disposal Point
Waste from a chemical toilet must never be dumped into nature, storm drains, or public restrooms. Always empty your cassette at designated Chemical Disposal Points (CDPs), often labeled as Elsan points or RV dump stations at campsites and motorhome stopovers (aires).
Step 2: Remove the Cassette
Ensure the internal blade valve is tightly closed. Open the external locker door, lift the retaining clip at the base of the cassette, and slide the tank out. Use the carrying handle or wheels to move the cassette to the dump station.
Step 3: Pour out the Contents Cleanly
Position the cassette near the disposal drain, swivel the pour spout outward 90 degrees, and unscrew the cap. Tilt the tank over the drain while holding down the air release vent button on top of the cassette. This allows air to enter as liquid leaves, preventing splashing and ensuring a smooth flow.
Step 4: Rinse and Recharge
Use the dedicated rinsing hose at the disposal site (never the fresh drinking water hose) to fill the cassette with a few liters of clean water. Cap the tank, shake gently to loosen residue, and pour it out again until the discharge runs clear. Add fresh chemical additive and a small amount of water before reinstalling the cassette.
Maintenance, Hygiene, and Odor Control
Maintaining cleanliness ensures your chemical toilet remains reliable and odorless throughout your travels.
Essential Maintenance Tips
- Seal Lubrication: The rubber blade seal can dry out or become sticky over time. Periodically spray the seal with silicone lubricant formulated for mobile toilets to keep it supple and leak-free. Avoid petroleum jelly, which can degrade synthetic rubber.
- Deep Cleaning: At the end of the travel season or after long trips, perform a deep clean with a dedicated cassette tank cleaner to remove limescale and stubborn deposits from internal surfaces.
Practical Travel Resources for Motorhomers
Navigating onboard equipment and campsite facilities is part of the learning process for every campervan beginner. When planning a road trip, having access to reliable resources on campervan maintenance and equipment can make a significant difference in your journey’s comfort.
Platforms like LSR365 offer practical advice on motorhome equipment, system maintenance, and travel preparation, helping beginners manage essential onboard systems with confidence.
Common Mistakes to Avoid
To keep your sanitation system in top shape, avoid these frequent beginner mistakes:
- Forgetting the Vent Button: Pouring waste without pressing the air vent button creates suction and causes splashing.
- Using Household Cleaners: Bleach, ammonia, and harsh bathroom cleaners damage rubber seals and destroy beneficial chemical breaking agents.
- Ignoring the Fill Indicator: Overfilling the cassette makes removal difficult and increases the risk of leaks around the valve seal.
- Storing Waste Long-Term: Never leave waste in the cassette when storing the motorhome between trips, as dried residue damages internal components and becomes very difficult to clean.
Conclusion
Using a chemical toilet in a motorhome is far simpler and cleaner than many first-time travelers expect. By selecting the right chemical additives, establishing a clear usage routine, emptying at approved disposal points, and maintaining internal seals, your onboard toilet will remain clean, hygienic, and odor-free. Embracing these simple habits gives you full confidence and independence wherever your journey leads.














Komentar